Tuesday, March 30, 2010
Thursday, March 25, 2010
Sunspot 1057 with an iPhone 3Gs!

So one of the great things about my new solar telescope is that it is a projection system so astrophotography fairly easy. Today I wanted to take a look at Spot 1057 which has doubled in size since I saw it yesterday. I was able to take an image with my iPhone using the Sunspotter Telescope as it projected the image on a piece of paper. The reason the image has grain is because of the nature of the paper. The Image was edited using GIMP 2.6.6. (Levels, Unsharp Mask, Transform).
There is the raw image:
Here is an image of the sunspotter telescope: 
Other raw images:
Sunday, March 21, 2010
Sunspotter becomes Moon Spotter and SLR Imaging on a Sunday Evening
News: Annie M. had a group of people over to her house last night in celebration of the Moon's Occultation of the Pleiades. She was able to take some images and stack them using HDR processing and they were published on Spaceweather.com. Congrats to my fellow amateur astronomer and friend for getting published... and it was exciting being there as she was taking those images! 
Ok... so Annie inspired me to try some imaging...
I spent the last few hours of my spring break enjoying the night sky. I decided to try my newly purchased Sunspotter Solar Telescope on the moon... and what do you know it works! Now I need to modify it to hold a Regal Finder... and I'll be able to trace the moon. The only issue is that the image isn't bright enough... I need to find me a nice 4" or 6" objective and make a folded projected refractor for lunar observations. (More on that later!)
Image of Sunspotter not being used correctly: 
I decided to take some images of the Sunspotter with my D-SLR camera and then I decided to try my hand at some astrophotography. I've been toying around with the idea of getting a Astrotracker for my DLSR but haven't been able to justify to $600 cost. Here I was trying my best to image without a tracking mount. The following images were taken with my Canon 50D, and a 400mm f/4 L lens and 1.5x teleconverter. I used mirror lock up and a Velbon Carbon Fiber tripod. I triggered the camera using a remote shutter cord.
Moon
Orion:
Clusters:
Cassiopeia and "E.T."
ISS PASS... some tripod movement... in this one
Pleiades
Saturday, March 20, 2010
Thursday, March 18, 2010
Travel Picks: Top 10 places to sky watch
I found this little article while surfing around, maybe you can use it to plan your next vacation. Click here to READ THE TOP 10.
Wednesday, March 17, 2010
Tuesday, March 16, 2010
Yogie and Steve's Webcam
These are two friends of my wife and I. I really like their little show, and it has some good information on how to modify a webcam. Enjoy!
Sunday, March 14, 2010
Saturday, March 13, 2010
Wednesday, March 10, 2010
Monday, March 8, 2010
Classic Look at a star party
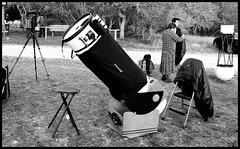
IMG_3878
Originally uploaded by MPR Photography-PhotoMPR.com
This is an image that I took at the San Antonio College Star Party. This image really looks like a classic black and white photos. I like all the texture and the busy background. The scope is my modified Meade Lightbridge 16". Those are my 20x80 binos in the back left and Danielle's 12" Port-A-Ball on the right.
Sunday, March 7, 2010
Couch Potato Telescope

Couch Potato Telescope
Notes after building the CPT Binocular Chair
I’ve seen the design for the Couch Potato Telescope (CPT) binocular chair many years ago. Sim Picheloup of Houston is the inventor and despite the name Couch Potato Telescope title Sim gives his invention it nothing to do with telescopes. The “CP Telecope” is strictly for binocular astronomy. The CPT allows it’s user to recline comfortably at various angles and swivel around horizontally. The beauty is while the view is reclining and spinning around the binoculars are suspended exactly in front of the user’s eyes.
After getting Celestron 20x80s I knew that I could have to do something about a mount because my neck was telling me that the photographic tripod just wasn’t cutting it. My astronomy pal, Rick, purchased a hardware kit from the Sim directly at the 2009 Texas Star Party. Mr. Picheloup sells his invention at various levels: Plan only, Plan and tubing, Hardware kit with plan, fully assembled. I obtained copies of the plan and decided to purchase the hardware at the local Home Depot.
The plan is 27 pages in length and at sometimes very unclear. There is a huge parts list of a mixture of parts, including a 12-inch lazy Susan bearing; polyethylene tubing; carpet tape; bicycle inner tube, screws of various sizes, and much more, about 160 parts total in various sections of Wal-mart and Home Depot. Having Rick helping was good because the plans are often sometimes confusing so even buying parts was challenging. It took two trips to the Home Depot each one about two hours in length to find all required parts. Some parts we couldn’t find so we had to come up with a substitute. The plan called for thin a specific pipe tubing but we found a copper pipe worked just fine and was much easier on the pocket book. If I had to
work on it again I would have purchased the hardware kit from Sim, which was listed on this geocities.com site for around $100. (Yahoo shut down geocities.com so Sim’s website is no longer up). Parts cost me around $85 locally.. I would have gladly paid the extra $15 to avoid the headache of staring at the hardware isle at Home Depot for hours.
The construction took about 10 hours total spread out across 2 days. As stated before some parts of the plan were confusing but we eventually figured it out. You start by pre-drilling holes in various parts, PVC pipes, electrical conduit elbows, and a few more random parts. Next you have to think back to your scouting days and tie some knots in rope. Then, friction joints that are the whole secret to the whole CPT design.
Some basic woodworking and mechanical tools are need and once the little sub assemblies are done the construction is fairly quick.
There are some improvements that Rick developed that we implemented in the design
and we also developed a few modifications of our own we developed while building my CPT. Some simple ones were attaching bungee cords to hold the chair down, adding a head rest to the beach chair, tying the clevis pin to the base.
As in typical fashion anytime I get something new it is cloudy for a good while afterward and that is the case now. The forecast doesn’t look promising.
I’ve tested the chair in my living room and it easily supports the weight of the 20x80 binoculars and Rick has even mounted 25x100s on his with success. One possible major over haul I might eventually do is to replace the ½” thick swivel board with a thicker board. I’ve read other CPT reviews on the internet and many have made this modification. For now I haven’t used the chair under real observing conditions so I’ll decide if that overhaul will be worth it.
Clear Skies Y’all! - Matthew
Friday, March 5, 2010
Tuesday, March 2, 2010
Astronomy in the Park

Feb 24, 2010:
Area park- This event was really a spur of the moment event. The sky was looking nice after a day of snow here in Texas. I text-ed Rick early in the morning to see if he wanted to head out to our dark sky site but with moon phase and the fact that I was working later than normal we decided to try observing from a park we scouted out a few weeks ago. I decided to sent out an invite to astronomers I knew that lived near the park. Before I knew it we had a small group!
It was fun!
Monday, March 1, 2010
Astro Club Sets up at Realestate Events to promote Dark Sky
This is cool! Hats off to this astronomy club.